At last, I got to spend a few hours back in my field. My task: to establish a baseline after the disaster of my first set of measurements. I also took along my camera to show you a little of how things look.
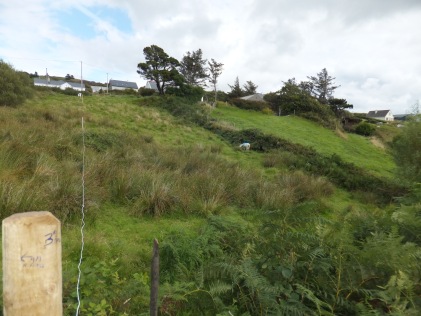
Facing West showing rushes in foreground, ferns, brambles and the drop to the left (South) at the bottom. You can clearly see the bottom ‘pole’ and Slieve League beyond. It’s on the Wild Atlantic Way’. Fabulous @ 1974 feet.
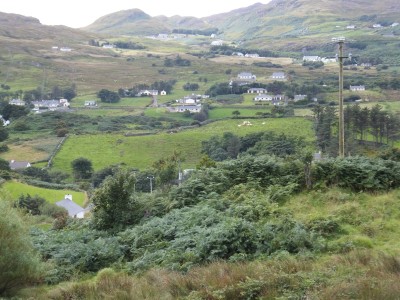
I realised the best plan for a baseline was to use the ‘amenities provided’ so I decided to use the telegraph poles. You see, when your field is not regularly supervised over the years, when the telephone guys come around, they plonk their poles on your ground, rather than your neighbours. Anyhow, I now have a pole just inside my fences at each end of the field. Being a very slopey field, the poles can be seen from everywhere, whereas a fence-post cannot.
So, I began by checking and adjusting the measurement between the knots on my measuring line. I was as much as 9 inches out in some cases (oops). So I got that right before I started. It reminds me of the maxim:
“There’s never time to do it right, but always time to do it again!”
The line is an unused white washing line on which I tied knots every 5 metres along its length. I’ve tied some red twine on the fifth knot (25 metres). Finally, I attached a short piece of rough twine to the front end, to allow me attach the line to the poles or to fence posts etc., without losing any inches off the line. I use a carpenter’s tape measure to capture the final few metres of each measurement.

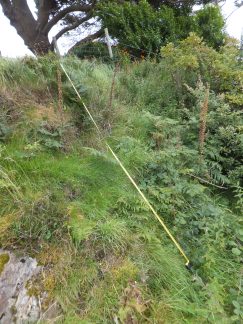
The line from fence post 3 to top of field, where you can see the top pole at right hand end of house. This pic also shows the strength of the slope and Ferns close by, Rushes in the mid ground and Brambles on southern boundary to the right.
Then I got some fence-posts and arranged these in a line-of-sight from ‘pole to pole’, putting the posts every 25 metres. Because of the 20% slope, I needed an extra post at 11 metres, (top of the slope) so I could see a full line from the first post down the slope. So my posts end up at 11M, 25M, 50M and 75M. From the last post to the far pole is 13M and with the small gaps from each pole to the adjoining fence, my field measures a total of 91 metres along this ‘baseline’. At the top/road end, it measures 26 metres across, giving me approximately 2,400 square metres (4,046 is an acre).
I still have to verify the measurement across the bottom end, which is awkward, because of the mound at that end where it falls away sharply at the SW corner. (Wasn’t this supposed to be straightforward?). Instead, I’ll measure at the foot of the mound, where I can see from fence to fence, north to south. Actually, if I do it at the 3rd round post (see photo), I have already noted that the post is 9 metres from the North fence, so all I have to do is measure the other way (duh!) to have a complete width. Looking at my site-map on the deeds (It’s tiny) and at the Google earth picture, it appears to be an almost perfect rectangle, so it should measure 26 metres down there too. I’ll trust the measurement on the ground long before the maps!
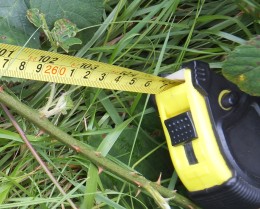
Measuring the drop at the rock, mentioned in previous posts, I used a tape measure and the camera to record. See below: 

Species: The photos show Willow, Rowan and a Sycamore along the boundaries. Then I have quantities of Rushes, Nettles, Thistles, Ferns and Brambles all growing strongly. Actually, the abundance of the growth is very encouraging. Shaun’s sheep have done a great job of processing the biomass and manuring the ground! I have lots to learn before I can begin to identify the lesser species, grasses, flowers etc. I have just ordered “Wildflowers of Ireland — a Field Guide” and will post a review in due course. Which reminds me, I have to do reviews on a few other books as well. Aranya in his book Permaculture Design, uses ‘D-A-F-O-R’ to record how prevalent each species is: D= dominant; A= abundant; F=frequent; O= occasional and R=rare. Some folks add M=Missing to record species you’d expect to find in an area, but don’t! So my collection of rushes, nettles, ferns and brambles all come in between D & A, depending on which part of the field you’re looking at. Thistles are O=occasional, but large, standing nearly 3 feet tall and with a 2-3 foot spread in some cases.
So, gradually I’m gathering information about the field, its flora, its shape and dimensions. My next step will be to measure from the posts along my ‘baseline’ to the various points along the boundary: tree, rock, stump, pipe, etc., and develop a base map, which I WILL share with you when it’s done. After that comes the beginnings of the design: permanent structural elements like paths, swales or drains, a pond, retaining wall, a shed of some kind, raised bed(s), and gradually adding planting schemes, starting with the trees. This won’t be a quick job, will it?
